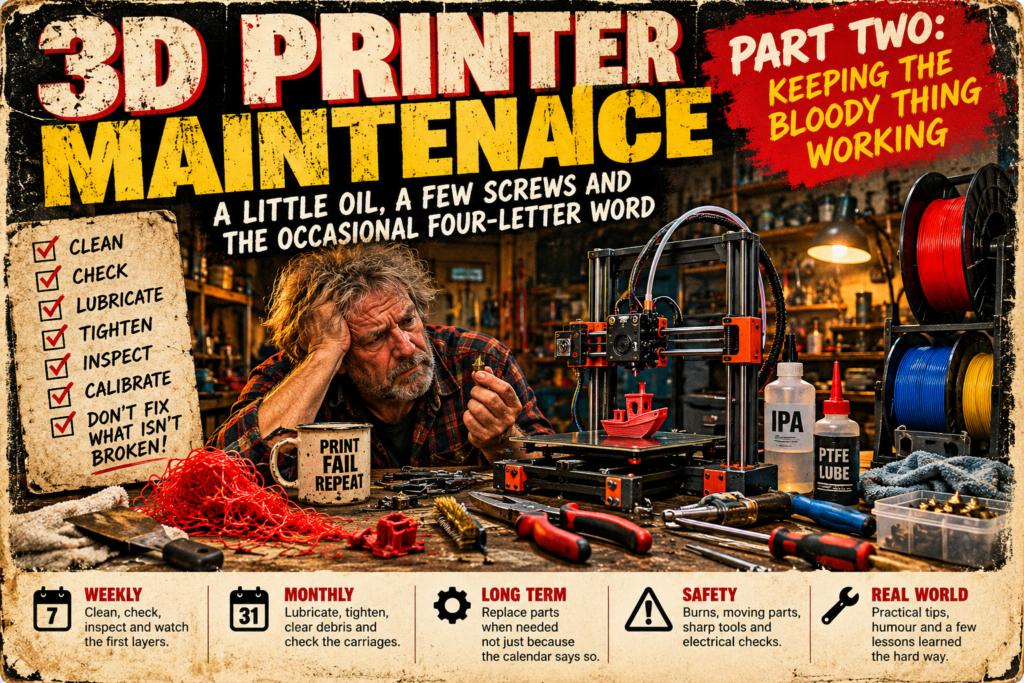
Part Two: Keeping the Bloody Thing Working
Well, here we are again.
I decided to write a second article about 3D printers. Not because I’ve suddenly become an expert, but because I’ve spent enough time with the things to know that owning one is only half the battle. Keeping it working is the other half, and sometimes that half seems considerably bigger.
I’m not going to spend much time talking about repairs. YouTube is already full of videos showing you how to dismantle practically every printer ever made.
Have you noticed how the people making these videos never seem to drop anything?
Every screw comes out perfectly. Every cable disconnects without a fight. Nothing rolls under the bench, disappears into the carpet or ends up somewhere it couldn’t possibly have reached.
And somehow they manage to keep everything in the camera frame!
Either they’re all brilliant engineers or there’s some equally brilliant editing going on.
I tried making videos a couple of times myself. Hated it. Couldn’t even stand the sound of my own voice.
So I’ll leave the videos to people with steadier hands, better cameras and apparently magnetic screwdrivers.
What I don’t see discussed quite so often is ordinary maintenance.
Not repairing something after it’s broken, but doing the little jobs that might stop it breaking in the first place.
And before we start, there’s one rule worth remembering:
Don’t fix what isn’t broken.
Sounds simple, doesn’t it?
Unfortunately, it’s a surprisingly difficult line to walk when you’ve got a screwdriver in your hand and an hour to spare.
Weekly Maintenance — Or Every 10–15 Prints
These aren’t commandments handed down from the great god of plastic. They’re a guide. Your printer’s manual takes priority, and how often you do these jobs depends on how much you use the machine.
Clean the Build Plate
A dirty build plate can cause all sorts of problems.
Fingerprints, grease, dust and little bits of plastic can stop your first layer sticking properly.
Depending on the plate’s surface and the manufacturer’s instructions, cleaning might involve isopropyl alcohol or washing with warm water and a little washing-up liquid.
Make sure it’s properly dry before using it.
A clean plate also gives the bottom of your print a nicer finish.
And let’s face it, after spending hours printing something, it’s rather annoying to discover the bottom looks like it was dragged across the workshop floor.
Check the Nozzle and Hot End
Have a look for plastic building up around the nozzle or hot end.
Remember the spaghetti monster from my previous article?
Well, sometimes that innocent-looking bit of plastic stuck to the nozzle is where the trouble begins.
Leave it unattended and you can end up with a great lump of molten filament wrapped around the hot end.
In particularly unfortunate cases, the mess can damage wiring or components and turn a simple cleaning job into an expensive repair.
And here’s a warning from experience: hot ends are HOT.
I know, astonishing revelation.
But it’s remarkably easy to forget when you’re concentrating on removing a stubborn bit of plastic.
A burn on the fingertip is unpleasant enough, and a serious burn can leave lasting damage to sensation.
Let the printer cool before inspecting it. If a cleaning procedure requires heat, follow the manufacturer’s instructions and use appropriate tools, not your fingers.
Inspect the PTFE Tubes
Those little tubes guiding your filament are easy to overlook.
Check them for wear, cracks, distortion and loose fittings.
If filament keeps jamming, take a look at the ends of the tube. Sometimes the end becomes distorted or no longer sits properly in its coupling.
A proper PTFE tube cutter costs only a few pounds and produces a clean, square cut.
It’s one of those inexpensive tools that can save you a surprising amount of trouble.
But don’t keep chopping bits off until the tube is too short!
I must tell you about an old Reliant and a short fuel pipe one day.
Suffice to say, making something shorter isn’t always an improvement.
And remember, some printers have different filament paths and tube arrangements. Don’t start dismantling them simply because somebody on the internet says you should.
Watch the First Few Layers
This is probably one of the most useful habits I’ve developed.
Many modern printers have automatic bed levelling, and I generally run it before each print.
Is that always necessary? Probably not.
But I’ve got into the habit, and it helps me spot when something isn’t quite right.
The first layer can tell you a great deal.
If the filament isn’t laying down properly, there might be a problem with the nozzle height, plate cleanliness, temperature, flow or several other things.
And if the first layer goes wrong, the next few layers aren’t necessarily going to rescue it.
Quite the opposite.
You may return later to discover an impressive plastic sculpture that you never actually asked the machine to make.
I like to keep an eye on approximately the first ten layers, particularly with a new model or unfamiliar filament.
You don’t need to stand over the printer like a prison warder, but don’t simply press Print and disappear without checking that things have started properly.
A few minutes of attention can save hours of wasted printing.
Monthly Maintenance — Or Every 100–200 Hours
Again, these are suggested inspection intervals, not fixed rules. A printer working eight hours every day needs more attention than one printing a little model every fortnight.
Lubricate the Moving Parts
This is where people can do more harm than good.
Different printers use different motion systems.
Some have linear rails, some have smooth rods, some have lead screws, and others have components that shouldn’t be lubricated at all.
Use the lubricant recommended for your particular machine.
And don’t assume that because a little grease is good, half a tub must be better.
Excess grease attracts dust and filament debris, which rather defeats the object.
A little in the right place is better than a lot in the wrong one.
Check Belts and Screws
Printers vibrate. Things move. Occasionally, things work loose.
Check accessible frame screws, pulley fasteners and belt tension according to the manufacturer’s guidance.
A loose belt can contribute to layer shifting and inaccurate prints.
But don’t go tightening everything until it squeals.
Belts can be too tight as well as too loose, and overtightening screws can damage plastic parts or strip threads.
The idea is maintenance, not demonstrating your strength.
Get Rid of the Dust and Plastic Rubbish
Anyone who owns a 3D printer knows that the things produce little bits of plastic almost as enthusiastically as they produce actual models.
Filament shavings, purge waste, dust and mysterious fragments seem to accumulate everywhere.
Give the accessible parts of the machine a careful clean.
Don’t forget filament-changing systems such as the AMS, CFS and similar units.
These can collect debris around their feed mechanisms.
Switch the machine off and follow its cleaning instructions. Use a soft brush or other suitable method, and avoid poking a vacuum nozzle into sensitive electronics or fans.
You’d be surprised how much rubbish can build up.
Or perhaps you wouldn’t. You might own one of these machines.
Check the Wheels and Carriages
If your printer uses V-slot wheels, check for wobble, flat spots or excessive resistance.
Some machines use eccentric nuts to adjust the wheel pressure.
They shouldn’t be so loose that the carriage wobbles, nor so tight that the wheels are being crushed against the rail.
Other printers use linear guides and need different checks.
Once again, know which system you’ve got before reaching for the spanners.
Long-Term Maintenance: Replace Things When They Need Replacing
The Nozzle
Nozzles wear out, particularly when you’re printing abrasive materials such as carbon-fibre-filled or glow-in-the-dark filament.
But there’s no universal rule saying you must replace a nozzle every few months.
A brass nozzle used with ordinary PLA may last a long time. An unsuitable nozzle used with abrasive filament can wear much faster.
Look for changes in print quality, extrusion problems or visible wear, and check the manufacturer’s recommendations.
If it isn’t worn or causing trouble, there’s little point throwing it away simply because the calendar says so.
And remember, some modern hot ends are integrated assemblies rather than simple screw-in nozzles.
The Safety Bit Nobody Wants to Read Until It’s Too Late
We’ve already discussed burns, but a 3D printer has other ways of reminding you that you’re made of rather softer material than the machinery.
Moving Parts Bite
Printheads and beds can move quickly, sometimes without much warning.
Keep fingers, hands, loose clothing and other objects out of their travel paths.
If you’re inspecting or adjusting moving components, follow the proper shutdown procedure.
A trapped finger isn’t improved by discovering that the printer has another 200 millimetres of travel available.
Sharp Tools Are Sharp
Another astonishing revelation.
You’ll probably use knives, cutters, scrapers, pliers and all manner of little tools while removing supports and cleaning prints.
Some supports are particularly stubborn.
Use pliers or suitable support-removal tools rather than trying to tear everything away with your fingernails.
Because sooner or later you’ll get a sharp bit of plastic driven under a nail.
Trust me, it hurts.
And if you’re using a knife, cut away from your hand. A finished model isn’t worth a trip to A&E.
Don’t Forget the Electrical Side
Look occasionally for damaged cables, loose connectors, unusual smells or signs of overheating.
If you discover anything suspicious, stop using the printer until the problem has been properly investigated.
Don’t go poking around inside mains-powered equipment unless you’re competent to do so.
There are plenty of things worth experimenting with in life. An exposed mains connection isn’t one of them.
The Most Important Maintenance Tool Is Probably Your Eyes
After several years of 3D printing, I’ve come to believe that a great deal of maintenance is simply paying attention.
Listen for a noise that wasn’t there yesterday.
Notice when a carriage starts moving differently.
Watch the first layer.
Look for filament dust collecting where it shouldn’t.
And if a print suddenly starts behaving strangely, don’t immediately assume the entire machine needs dismantling.
Sometimes the solution is a clean plate, a fresh piece of PTFE tube or a little adjustment.
Other times you’ll spend three hours looking for a problem, only to discover you forgot something embarrassingly obvious.
I’ve done that too.
The trick is knowing when to intervene and when to leave well enough alone.
Which brings us back to where we started:
Don’t fix what isn’t broken — but don’t ignore something that’s telling you it’s about to break.
It’s a fine line.
And if you cross it, there’s always the shite drawer.
Mine’s getting rather full.
Greyhat
A final thought: These are general maintenance suggestions drawn from experience, not a replacement for your printer’s own instructions. Different manufacturers use different materials, mechanisms and procedures. Check the manual before lubricating, adjusting or dismantling anything.
Leave a Reply